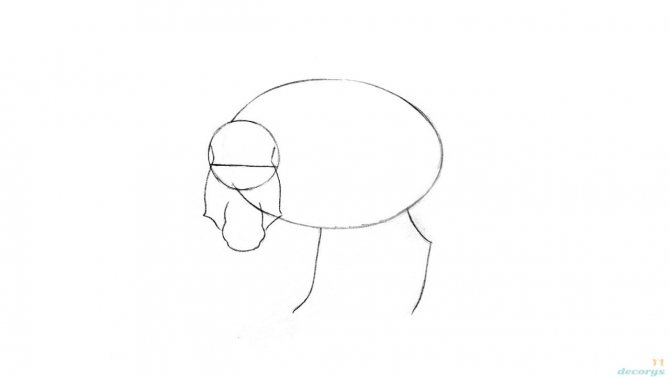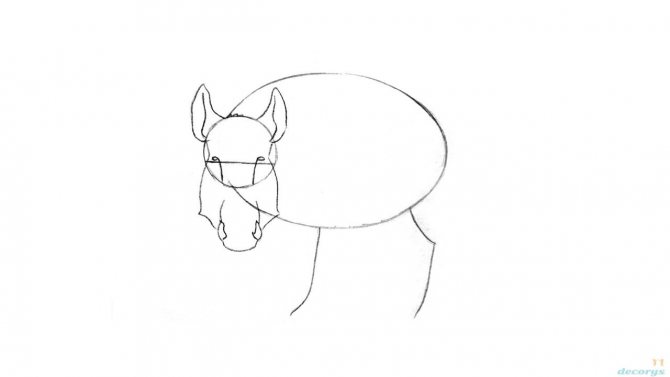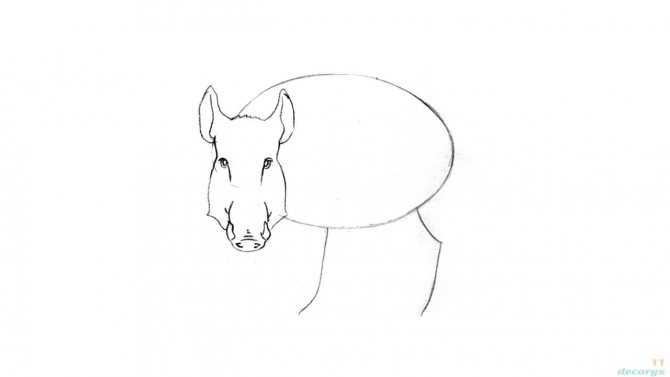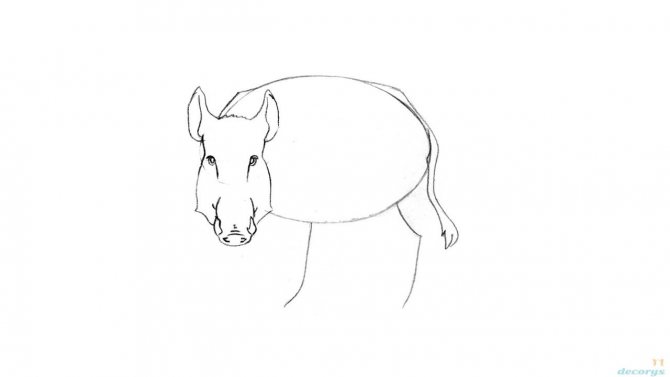
Pigs are a noble family, a feature of which are short legs and heels. Domestic pigs are a popular image among kids, but not every adult manages to draw them correctly.
In this lesson, I will show you how to draw a pet pig, boar, and warthog correctly. You will learn about their general anatomical features and the individual species differences. Even if pigs don't interest you in any way, the lesson may come in handy for creating fantastic creatures, for example.
Drawing a domestic pig
Skeleton
The most obvious feature of pigs is that their length is greater than their height. The head does not rise above the line of the shoulders, so the body is very easy to outline a slightly curved line.


Muscles
Since pigs are quite fatty, paying attention to muscles would be inappropriate. But, they are still there, let's look at the schematic drawing below.
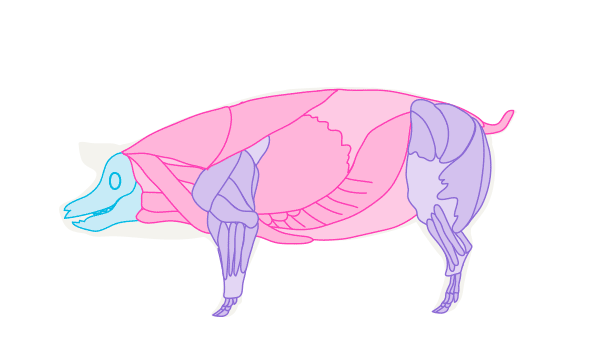

Structural features.
- The snout is long, with a flat snout;
- The ears are long, wide, usually sloping forward. They easily cover the eyes, so if you are too lazy to draw eyes, take advantage of this feature;
- The body is large oval, with a wide belly;
- The tail is short, with a faintly visible tassel on the tip, can be rounded;
- Neck not prominent, broad, merges with body;
- Legs short, thick, on split hooves.
The color of the skin depends on the breed. The classic farm pig has pink skin and a sparse, light-colored coat.


Head
Use the steps below to draw a pig's head. It is very important to understand and accept the peculiarities of the pig snout, which do not resemble the snouts of other animals. Do not pay attention to the details at this stage, we will deal with them later.


Pig's head - side view
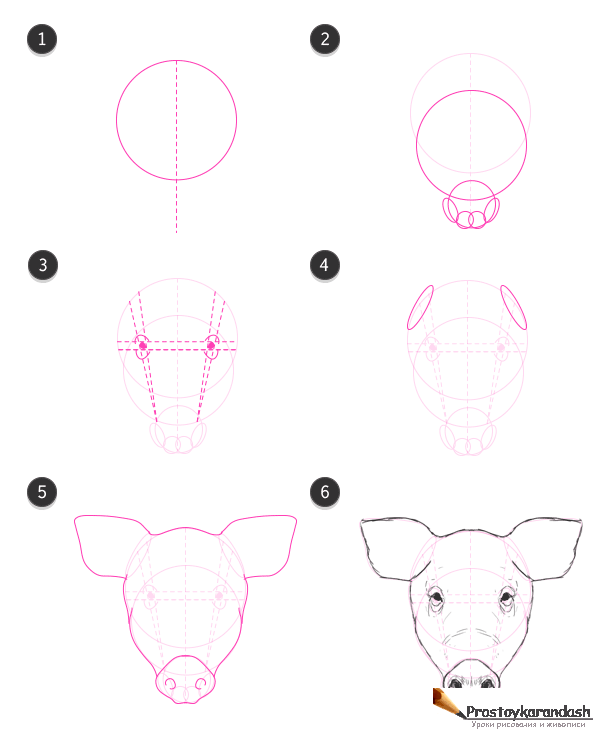

Pig head - front view
An easy drawing with a simple pencil
The boar (drawing for children with a simple pencil) is a rather complex character that is suitable for work with children from 6 years old. Gradually you can move from working with cartoon characters to drawing a real beast.
Pencils, paper, and supplies
To draw a boar, you will need:
- an eraser;
- a sheet of white paper;
- sharpener;
- a lead pencil.
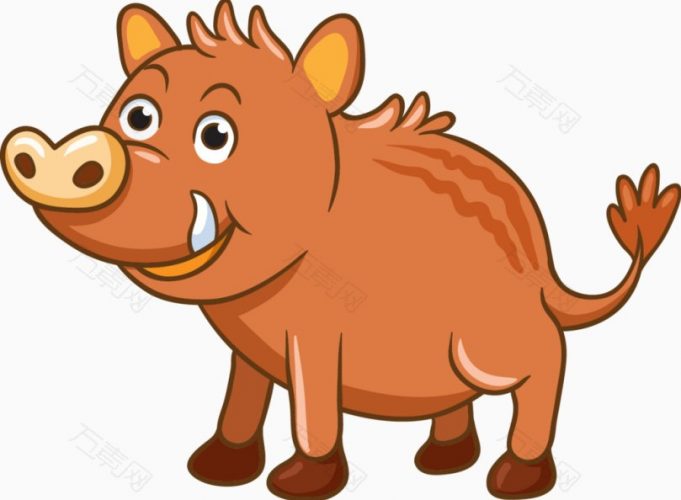

In the future, the drawing with a simple pencil can be used as a template for drawing with colored pencils or paints.
Step-by-step process
Using the following table with step-by-step steps and photos, you can draw a cartoon character:
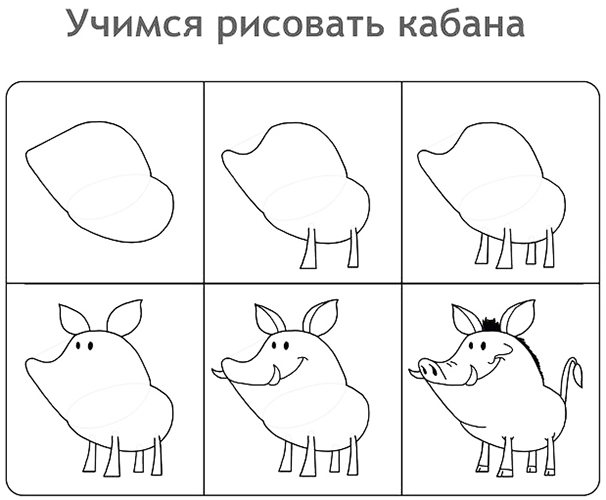

| What you need at this stage | Description of stage | Picture |
| A sheet of paper, a simple pencil | First you need to draw 2 ovals on a blank sheet of paper. The location and approximate shape of the figures can be seen in the picture. | |
| A simple pencil. | At the bottom of the figure, draw 2 curved rectangles that will represent the near legs. Additional shapes should go into the rectangle area, overlapping each other. At the top of the need to create a bend - as shown in the figure. He is needed to draw the heel. | |
| A simple pencil | Draw the far legs. It is important that the figures only touch at the points, but do not go over each other. As you can see in the image, they will be slightly smaller than the near legs. This is affected by the positioning of the figure. | |
| Simple pencil, drawing | At the point where the top bend of the snout begins, draw two small ovals - the future eyes. They will also be different in size: the near - a little more, far - less. On the upper oval, not reaching the bend, you must draw a pair of ears. They look like small leaves and are drawn accordingly. | |
| Drawing, simple pencil, sharpener | When the main elements are ready, you can proceed to drawing the small details. In order for the drawing to turn out neatly, the outer parts need to be handled lightly, so that if possible you can tweak them without trace. The internal parts should be drawn with a sharp pencil. First you need to detail the ears: draw arc-shaped lines that merge with the general figure at the ends. Not far from the snout, you need to draw an arc-shaped line, and from it, a pair of fangs. | |
| Eraser, drawing, simple pencil and sharpener | Use the eraser to remove unnecessary parts of the elements. Between the ears it is necessary to draw a kind of scruff with a pencil. On the perimeter of the head (from the back) also depict a small bristle. Use arched lines to draw a tail. Small oval, like a petal - tassel on the tail. On the legs to draw hooves. Also depict the "wrinkles" on the body. Next detail the snout. Draw the nostrils and the outline itself, and then - small folds between the nose and eyes. |
When the drawing is ready, you can trace it with a sharp pencil for better brightness and clarity.
A step-by-step process
A boar (the drawing for older children is no longer a cartoon character, but a wild animal that has a resemblance to a pig) can be depicted as follows:
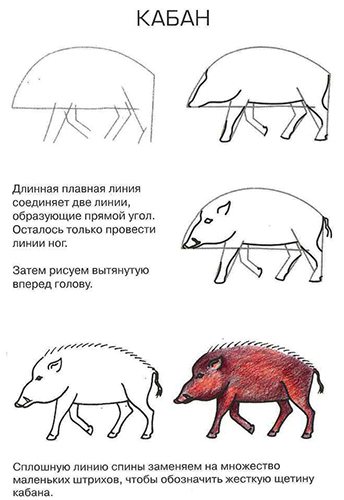

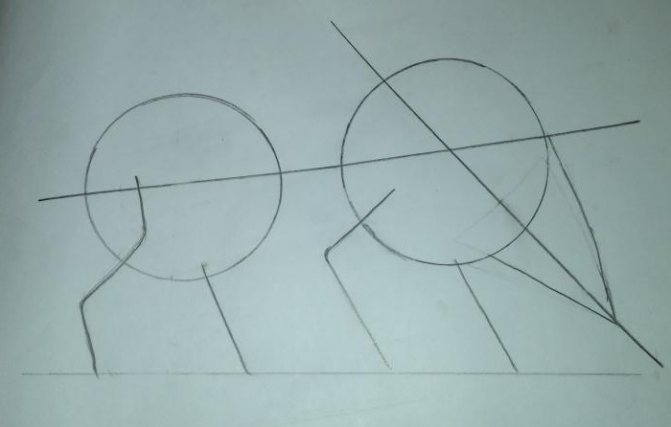
- First, you need to draw a vertical and horizontal line. The approximate location can be seen in the drawing. Connect the lines with a single arc-shaped line. From the horizontal line, draw the legs, using even and broken lines. As you can see, the original vertical line will also be part of one of the legs.
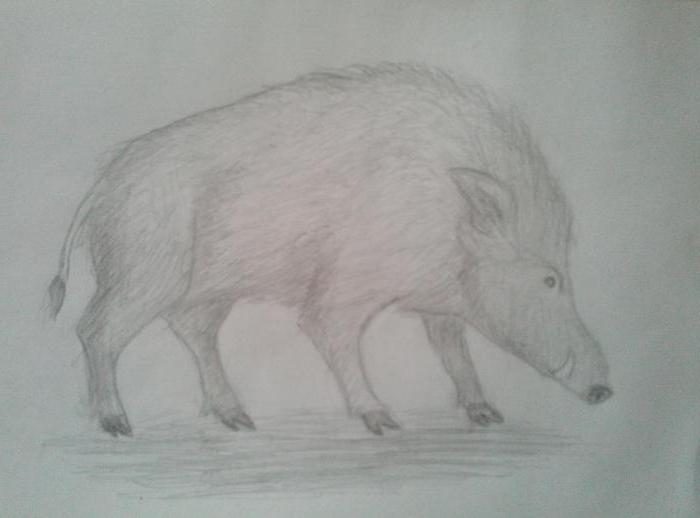
- Using smooth lines and transitions, draw the outline of the animal. It is important to observe the locations and curves of the lines - as shown in the figure.
- When outlines are ready, you can move on to detail. On the head to represent the ear, trace the eye. From the extreme point of the arc line draw two wavy lines - the future tail of a boar and detail the heel.
- Instead of an arc draw a bristle with short broken lines. In the lower parts of the legs to indicate the hooves. Tail darken. With eraser remove lines marked with a simple pencil.
Done drawing can be optionally painted or leave it that way.
Drawing a wild boar
Skeleton .
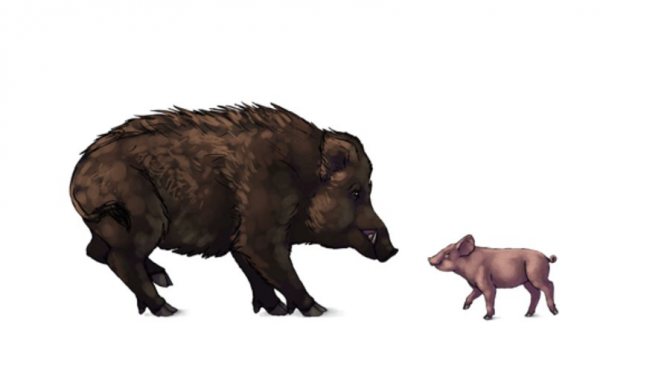
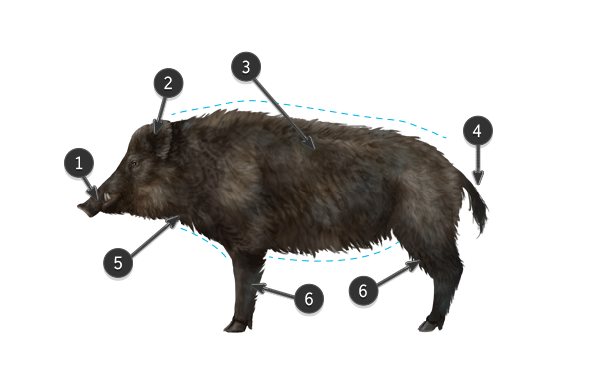
The silhouette of a wild boar is very similar to the silhouette of a domestic pig (they are, by the way, the same kind!). To emphasize the difference, you can draw the head as far forward as possible upward, and cover the boar with thick fur along its back.


Structural features
- The snout is slightly longer than that of the domestic pig. Two tusks grow from the lower jaw;
- The ears are shaggy;
- The entire body is covered with coarse, tough wool. A protruding row of hair along the back gives the boar a more showy posture;
- The tail is short and shaggy;
- The neck is still broad and not prominent;
- The legs are short and covered in fur.
The fur is dark, grayish-brown.

Head
The head structure of the domestic pig cannot be fully relied upon, for the wild boar has a longer snout, and the fur changes its appearance.


Boar's head - side view
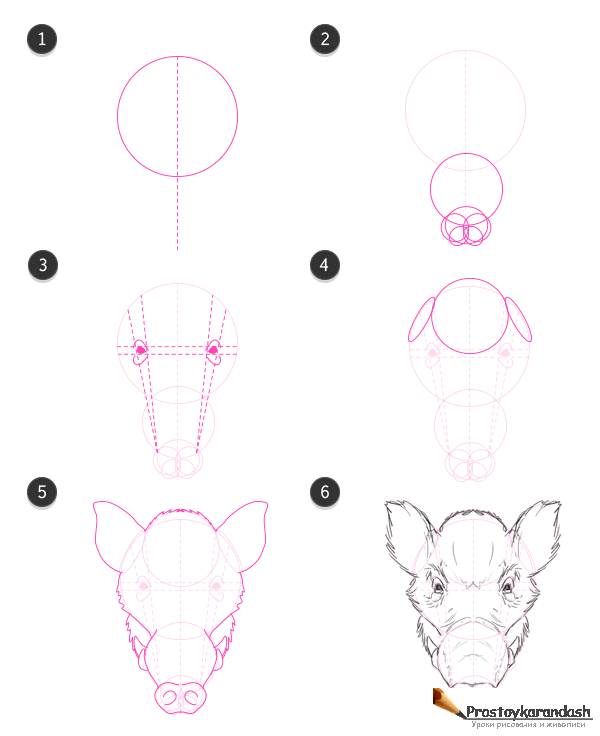

Boar's head - front view
The first preparatory steps
Having studied the structure and habits of the animal, the artist, as a rule, begins to think about what and how to draw a boar? It is much faster and easier to do it with a pencil, especially since the image can be colored later. So, it is better to start with a few straight lines - artists call them axial lines, so that the drawing in the future came out symmetrical and proportional.
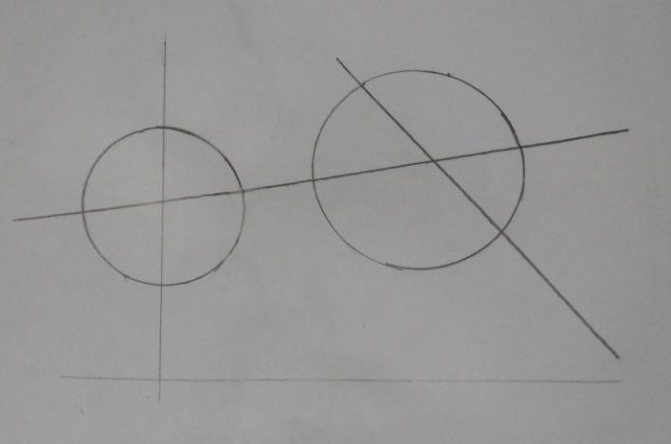

At the preparatory stage it is important to establish the size of the image of a boar, and one of the lines to draw horizontally, as if outlining with it the lower boundary, which will be the boar.
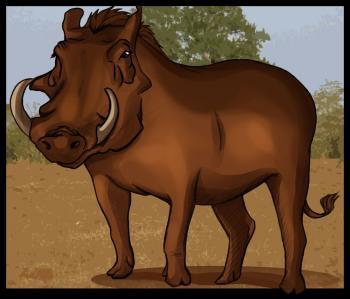
Drawing a warthog
Skeleton
Warthogs, unlike their brethren, can raise their head above their shoulders. They are muscular and lean, and their silhouette seems more fragile.
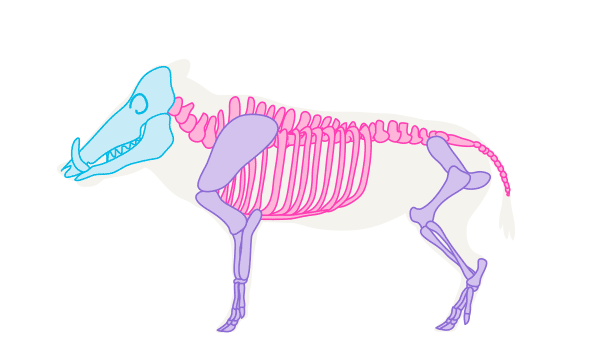

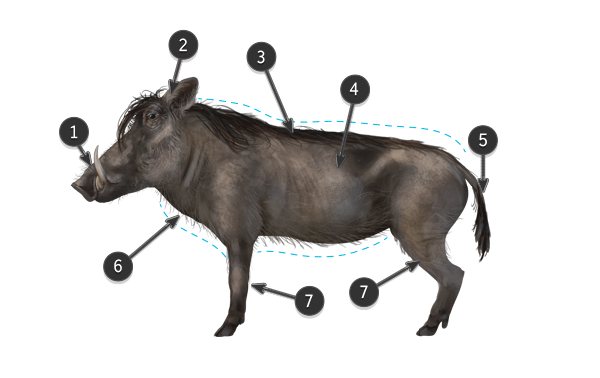
Features of the structure
- The snout is long and flat, with two pairs of tusks;
- The ears are fluffy on the inside;
- The back is covered with a mane of two colors: black with a golden or red glow;
- Body lean, angular;
- Tail of medium length, with a fluffy tip;
- Neck thick, but strong, broad;
- Legs long and thin.
The skin of the warthog is rough, wrinkled, and covered with sparse dark fur along the upper part of the body and lighter along the lower part. The skin itself is brownish-gray or black.

Head
The warthog's head is peculiar, the main feature being its high-set eyes. And also "warthogs", but about them later.
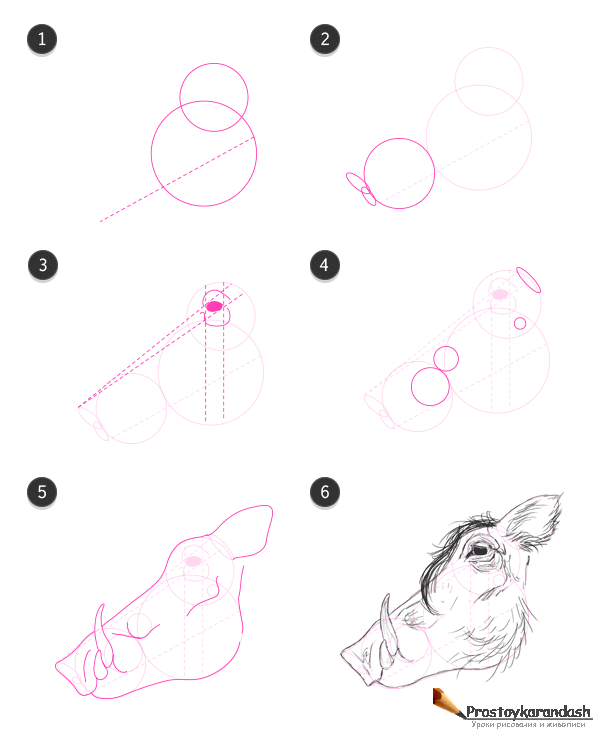

Warthog head - side view


Warthog head - front view
Drawing with water-based paints
The boar is not only a dangerous predator. The drawing can show the animal as the closest relative of a harmless pig. Such images are suitable for children ages 2-4.
Pencils, paper and supplies
For drawing you will need:
- honey watercolor;
- brushes;
- A cup for brushes and water;
- a lead pencil;
- eraser and eraser.
If desired, you can use different paints: gouache, finger paints.
Step-by-step process
To begin with, it is necessary to draw a template, which later can be painted.
Step by step process of carrying out the work:
- To begin with, create the figure of the animal. To do this, you can use the diagram that is used to draw a boar in pencil.

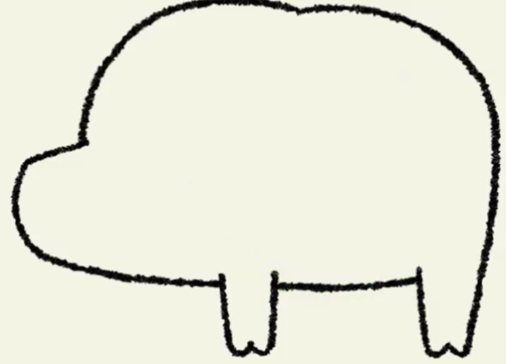
- When the base is ready, start detailing. In the upper left part of the outline of the boar draw the ears. They are similar in shape to pointed ovals or plant leaves.
- In the most protruding part of the figure will be a nickel. The entire area does not need to separate, just visually measure out the middle and surround it with an oval. Inside to indicate the nostrils - 2 small black vertical points.
- Near the ears place a round dot - the eyes of the animal.
- Visually draw a vertical line just above the eye to the right side of the picture. At the point where the line meets the border figure of the boar, draw a little curved line up - the future tail. At the tip draw a tassel.
- Also, the boar needs to draw another pair of legs and separate the hooves.
- At the bottom of the muzzle, near the snout, draw an arc and mark the fang.

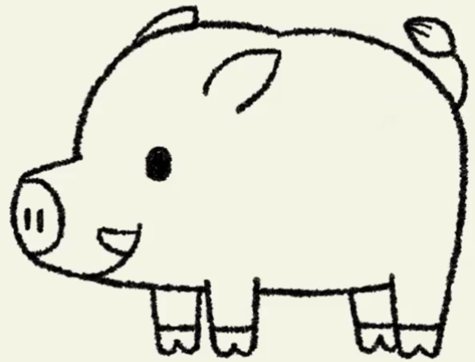
- Draw strokes all over the back surface in several layers to show the bristles of the boar.

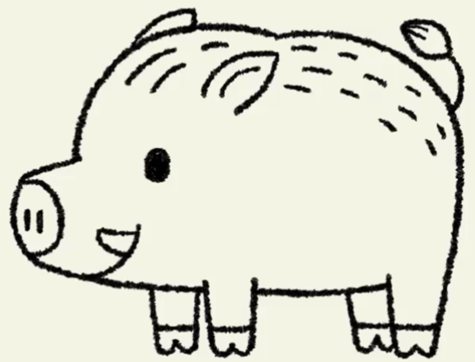
- When the base is ready, you can start painting the picture.
- To paint the boar, you will need many shades of brown.
- To start with, paint a small amount of yellow with a wet brush and distribute the paint all over the drawing.
- While the paint is drying, mix a small amount of brown and black. Use this shade to paint the hooves. Using a thin brush, draw the mouth line and fill in the eye, trace the tail line.
- By mixing brown, yellow and a little white, get a nice light shade of brown. Use this color to fill in the boar's body and tail.
- Using pink (or mix white and red), you need to paint the inside of the boar's ears and heel with a thin brush.
The finished drawing looks as follows.
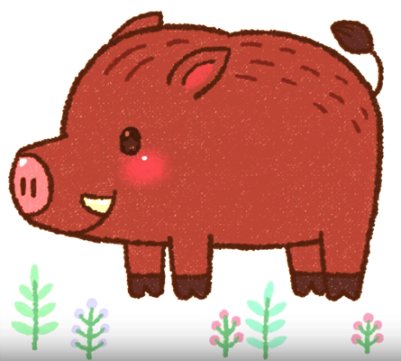

Oil Paint
The boar (oil painting for children) is quite difficult to draw. It is best to allow older children to work with oil paints.
Peculiarities of work with oil paints:
- it is necessary to prepare a palette, as the paints require mixing to obtain the desired shade;
- it is important to use quality brushes to get a good drawing;
- oil painting is done on synthetic, cotton or linen canvas;
- To show a child the culture of oil painting, it is recommended to buy an easel. It not only simplifies the process, but also allows you to identify mistakes faster;
- Mastichin - a device that is used to remove excess paint from the canvas. It can also easily be used to mix several types of paints;
- For oil you will need solvents. Turpentine and purified linse oil are used most often. Solvent can help you identify poor quality paint: if you can smell a pungent, unpleasant odor when you mix it, there is a high risk of buying a bad oil.
You can also buy turpentine or other strong solvents to easily clean brushes and palette.
Pencils, paper and supplies
The supplies that will be needed for the work:
- a simple pencil;
- Eraser and sharpener;
- oil;
- solvents;
- palette;
- canvas;
- brushes and brushware;
- mastichin.
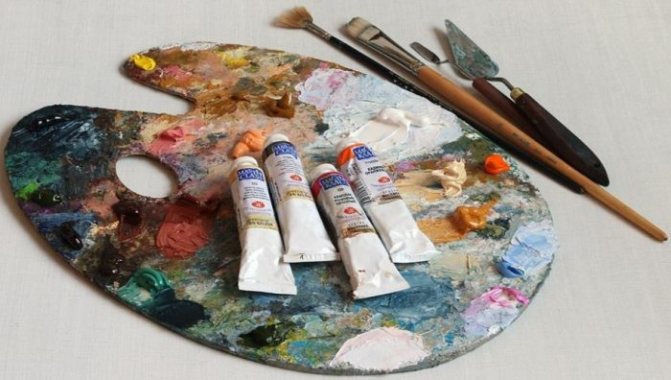

To paint a boar, you will need a small set of oil paints. These include: cadmium red, yellow medium, cyan blue, titanium whitewash, and mars black. Other paints of the same color can be used if desired.
Step-by-step process for doing it
Drawing for young children will seem very difficult, so it is best to allow younger and older children to work with templates and oil. A real boar is a complex animal that requires drawing many elements.
Steps to do the job:
- To begin, draw 2 circles of different sizes with a simple pencil. If desired, you can use a compass. Also, a simple pencil to connect the figures with each other to form the body of the animal.
- Using rounded lines, mark the boar's muzzle. Using curved lines to indicate the legs. Focus on the following picture.
- When the outline is ready, you can start drawing the muzzle. To do this, curved lines are used. It is necessary to draw the skin folds, the heel, tusk and ear.
- Then continue to draw the muzzle: draw the tusk on the other side. Draw the left ear, and between them draw the bristles. Using lines, make the drawing more detailed. Under the ears, you need to draw skin folds and eyes.

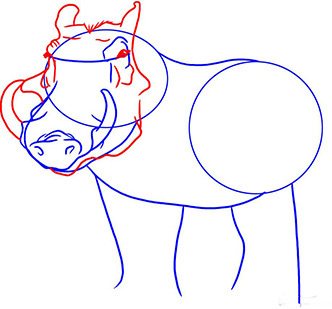
- The light outlines drawn earlier need to be drawn. On the head and back, draw the hair. The lines of the abdomen also need to be drawn and continue drawing the legs. It is also necessary to depict the texture of the drawing - using the lines to highlight the more voluminous parts of the body.

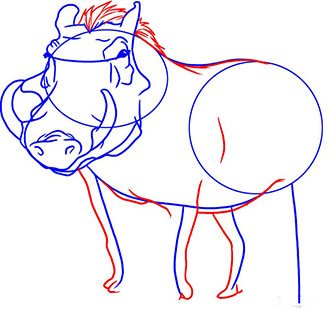
- To outline legs to the end, to form hooves and to continue drawing the back part of a boar's body. On the back, draw the tail - as shown in the picture.

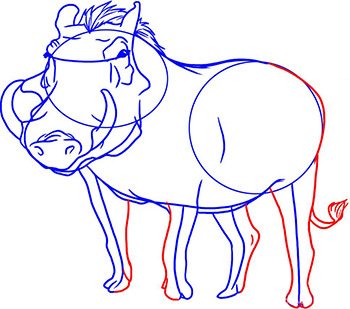
- When the drawing is ready, you can remove unnecessary details with an eraser. Also, to make it easier to work with oil on the template, you need to lightly shade the dark parts of the drawing.
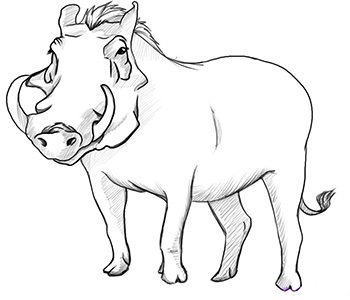
- In this case it is necessary to trace the folds around eyes, inside of legs, lower part of abdomen, far part of muzzle and snout. The result will be such a drawing:

- When the bulk of the work is done, you can begin working with oil.
- The boar is an animal of brown color. To get the right color, you need to mix blue, yellow and red oil in equal proportions. To do this, you need to use a palette knife and palette knife.
- The finished color should be divided into several parts. Add some black to one of them, so that you can use it to mark the darkened parts, and white to the other.
- The resulting shades, using solvents and brushes, should be painted over the designated places of color and shadow.
- The brush on the boar's tail is black, so it will be necessary to paint it with oil of the appropriate shade. The eyes can also be painted with black oil.
- The boar's tusks have a slightly gray hue, so you can mix a little black and a lot of white oil.
If desired, you can paint the space around the animal and fill it with various decorative elements. When working with oil it is necessary to be guided by the given image.

The boar is the largest member of its family, it is also called the "wild pig". In the wild animals form packs, which consist of females and last year's boar cubs. The average lifespan of a boar is about 10 years, but domestically raised animals can live up to 20 years.
Children can learn about the existence of such animals from cartoons. The most striking representative is Pumba (which is quite easy to draw yourself), but you can also meet Bebop in the cartoon series "Ninja Turtles".


