Do you want to learn how to draw a peacock? Follow the instructions in the article and you will have a beautiful bird.
The most unusual and majestic bird on earth is the peacock. Thanks to its luxurious tail, they attract attention and mesmerize. Many artists try to convey its splendor on their canvases.
We will also teach you how to paint 3D illusion. Read detailed instructions in another article on our site. With step-by-step explanations and interesting techniques, you will learn how to draw a cat, a banana, a butterfly, a heart, etc.
So how do you learn to draw a peacock? There are many instructions in this article to help you recreate this majestic bird on paper. Read on.
Peacock bird for beginners - pencil drawing step by step for a child of 6-7 years: instructions, video, photo
You can use the instructions for drawing the peacock together with a child. Armed with a simple pencil and a sketchbook, you can begin to depict the bird. So, drawing the peacock bird for beginners. Here is a pencil drawing step by step to a child of 6-7 years - instructions with photos:

Draw two circles
- 1 step Will be a small sketch. To begin with a circle is drawn - this is the head. Immediately below the circle, draw an oval in a horizontal direction. Divide the circle into two parts, connecting the perpendicular line to the oval.
- Step 2. Smooth lines combine the circle and oval to get a neck. Thinking about which side of the bird will have a wing, mark it with two lines, imitating a leaf.
- Step 3.. On the opposite side of the wing mark the pupil with a dot. Next, finish drawing and the eye itself. You can immediately draw the eyelashes. On top of the head you can portray a crest in the form of a crown. 3-4 feathers will be enough. Do not forget about the beak. It should be sharp and curved.
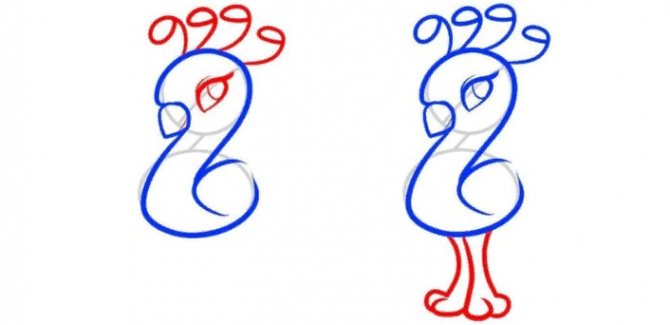

Doris dot dot, eyes and feet.
- Step 4. Feet .. There is nothing complicated here, they can be depicted in the form of sticks, arranged as a fan. But for the integrity of the composition it is better to make them volumetric. For this purpose, vertically trace three equal strips from top to bottom. Then connect them to each other with arcs. You will get a real bird's feet, if you complement them with claws.
- Step 5. The most important. Imagine the scale of the bird's tail, and from the torso line make two marks for the width of the tail, drawing arcs in different directions. Connecting them in a semicircle, we get a fan of the tail. Now it should be divided into sectors. They start from the point of connection arcs end in the middle of the tail.
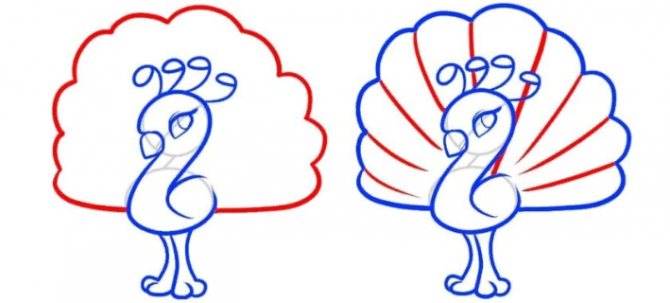

Draw the fan and divide it into sectors - the tail
- And then use your imagination to decorate with different patterns.
- Rhombuses, curls, circles or intricate designs will complete the drawing.
- Now you can paint the peacock. Take a blue pencil and paint the body.
- Paint the face in pink, orange and yellow.
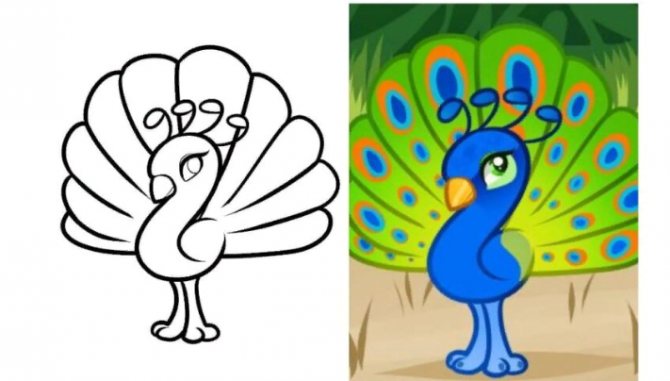

Peacock Bird for Beginners - Drawing in Pencil
- Continue decorating the bird using other colors and shades of pencils.
At the end, trace the outline of the peacock with a black pen - done. Look how beautiful it turned out. Below you will find a few more ways you can draw a peacock, and the photo instructions will help you.
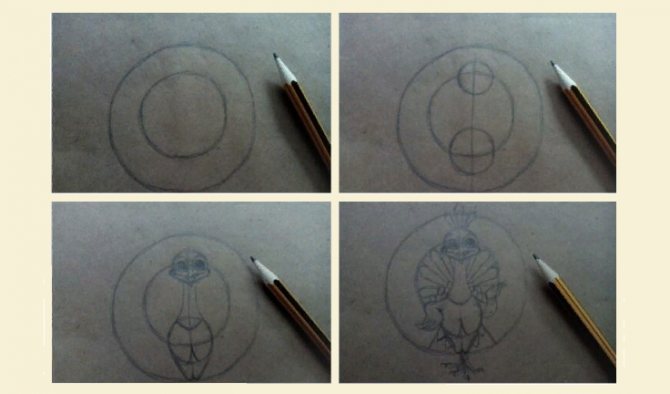

Instructions on how to draw a peacock Instructions on how to draw a peacock Instructions on how to draw a peacock Instructions on how to draw a peacock Instructions on how to draw a peacock
Here is a video detailing how to draw such a beautiful bird:
Watercolor
To depict the peacock with watercolors, in addition to paints, you will need the following materials and tools:
- watercolor thick paper;
- A simple pencil;
- synthetic brushes #4 and #1;
- eraser;
- a small vessel with water;
- tissue for brushes;
- drawing board;
- adhesive tape for fixing the paper on the drawing board.
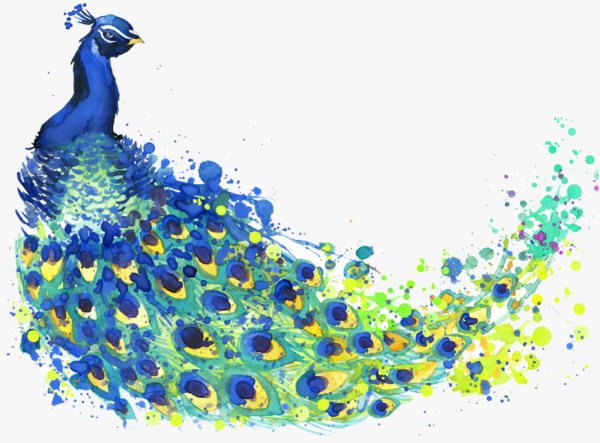

The work takes place in the following 2 stages:
| № | Stage | Description |
| 1 | Sketch. |
|
| 2 | Work with watercolor. |
|
How to paint a peacock feather: step by step instructions
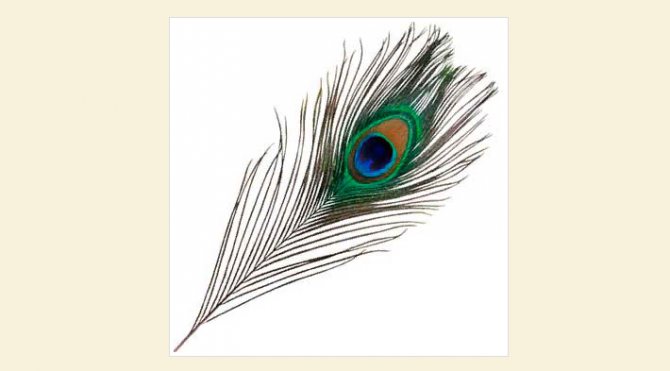

Peacock feather
If the task is to draw a single element, such as a feather, then you should first study the original image. The photo above shows a real feather of this bird. To draw it is simple. How to beautifully draw a peacock feather? Here are the instructions step by step:
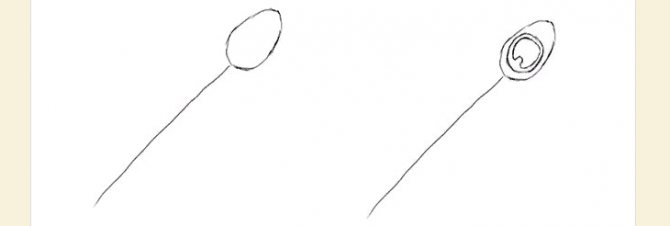

Draw an oval, then inside another oval with a notch
- Draw a diagonal line as the base of the feather. At the end of the line draw a shape similar to an egg. Inside it, the inner outline in the form of an oval, then another smaller one with a notch.
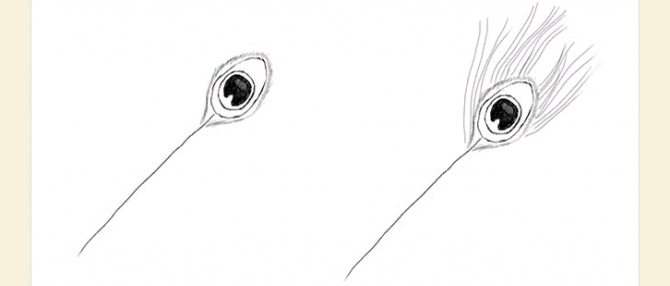

Near the oval, draw the tufts.
- From the main oval, draw furrows resembling bristles, and on top of long hairs, continuing to draw them to the stem. Closer to the oval, fill the space tightly with lines.
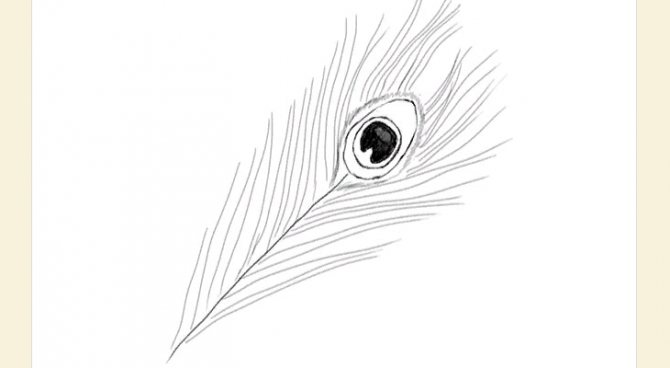

Continue drawing tufts all along the stem of the feather
- Color the pretty part of the feather with azure and green, highlighting the eye with the notch with a darker color. You can add ochre to show the overtones.
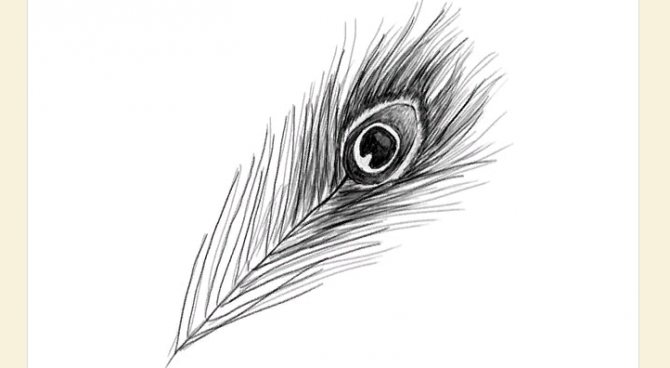

Draw out the tufts more clearly with pencil and paint
- The feather lint can be highlighted with thin strokes of black paint.
As you can see, everything is simple. Just follow the instructions and you will be able to depict such a beautiful feather.
The classic method of knitting the Peacock Tail
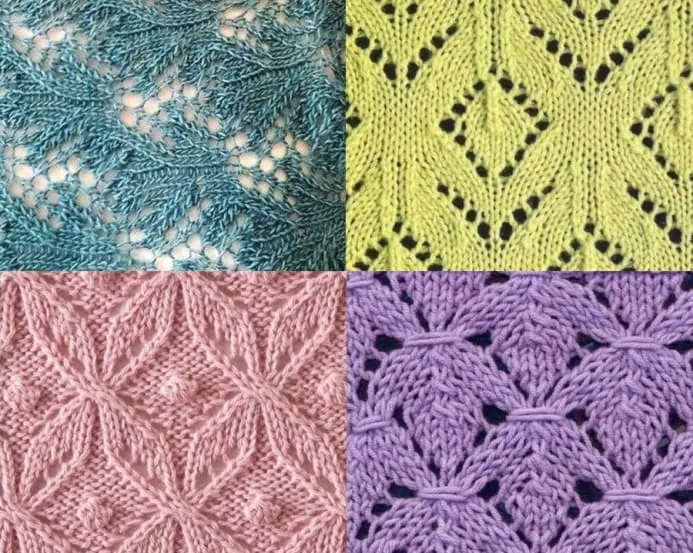
There are 5 schemes of the Peacock Tail knitting pattern, the descriptions of which we will now get acquainted with in sequence. In essence, the general principle is the same, but there are small nuances that change the appearance of the knitted fabric.
Knitting description: Collect the number of loops, a multiple of 18 plus 2 leading edges: 1 p.: front stitches, 2 p.: back stitches, 3 p.: 2 stitches together - 3 times, (rip, 1 face) - 6 parts, 2 stitches together face. - 3 р. 4 rd: reverse st.
Repeat from 1st to 4th st.
Editor's tip: If you want to get a looser openwork, take a 1-2 number larger needles.
How to quickly draw a peacock by hand on paper?
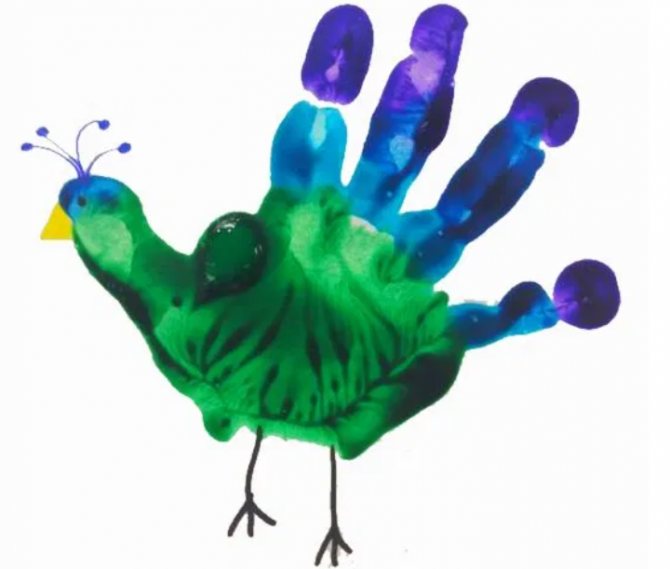

Drawing a peacock by hand
For the youngest artists, the technique of drawing the bird with the palms of the hands will be suitable. This interesting practice will turn into a game. How to quickly draw a peacock by hand on paper? Here are the instructions:
- Paint the palm with the colors described earlier.
- You can paint each finger a different color and vary the elements already on the dried paint.
- Draw the outline of the body, feather hairs, eye and beak with a black felt-tip pen.
Read more:
- Paint the palm green.
- Cover the thumb with blue.
- The index finger will be purple.
- Paint the rest of your fingers blue.
Draw a peacock with your hand
Painted palm on a piece of paper. Immediately get colorful bird. To make the tail puffy, palm can be applied several times, adding yellow and white shades. After that, finish drawing the eyes, paws, beak, curls of feathers. You can draw this bird with the palm of your hand like this:
Drawing a peacock with your hand
How to draw a little kwami peacock from Lady Bug, the peacock mascot: step by step
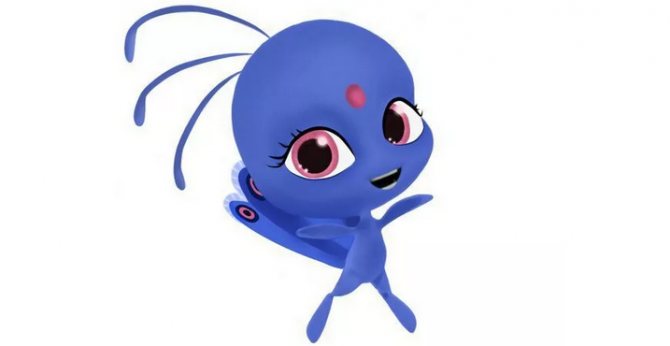

The little kwami peacock from Lady Bug
A favorite cartoon of many children. Surely your little one has asked you to draw someone from the kwami. How to draw a little peacock from Lady Bug? Here are the instructions step by step:
- In the center of the sheet, draw the head from a circle with convex cheeks on the sides.
- Just below, draw an oblong body in the form of an oval, connecting to the head with two lines, this will be the neck.
- Arms draw on both sides of the oblong lines from the neck to the end of the torso.
- Feet consist of two elongated ovals, feet form two circles.
- Eyes should be made large drop-shaped. Inside mark the pupils with arcs, in the center draw two elongated rhombic shapes. Add a mouth and draw a bold dot on the forehead.
- The tail consists of five drops from the central part, two more feathers on each side.
- Inside, design each feather, paying attention to the original image.
You can start coloring the character. Now draw the peacock mascot kwami from this cartoon:
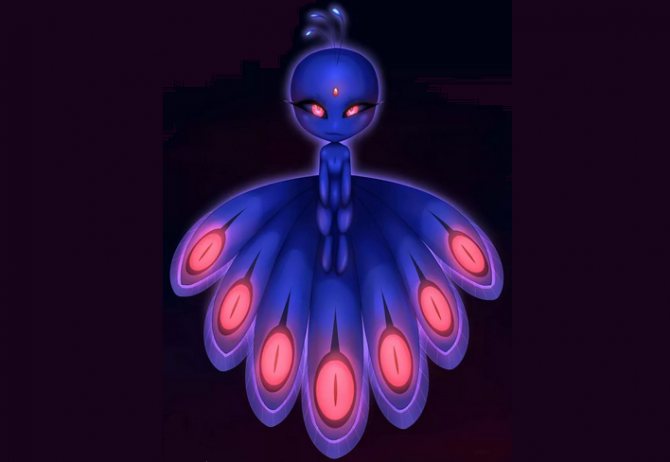

The little kwami peacock from Lady Bug is the mascot
To draw the mascot quickly and easily use a protractor:
- Circle it on the paper completely.
- According to the plot, the artifact has nine segments, so divide the semicircle into 9 identical parts every 20°. But you can also draw a smaller number, for example, 7. Then make a larger indentation - 25° to 30°..
- From the center point on the bottom line to the points of the segments draw lines to make rays.
- Along the top edge, draw arcs from one point to the other, so you get a tail fan.
- In place of the central point draw a small drop, in it another smaller.
- In each sector of the tail finish drawing the top ovals.
- Now you can start coloring, using a colored image of the mascot.
- Body and legs should be depicted in the form of ovals.
- Head draw according to the instructions above.
Do not forget to depict the crest. Done.
Peacock feather - method number 2
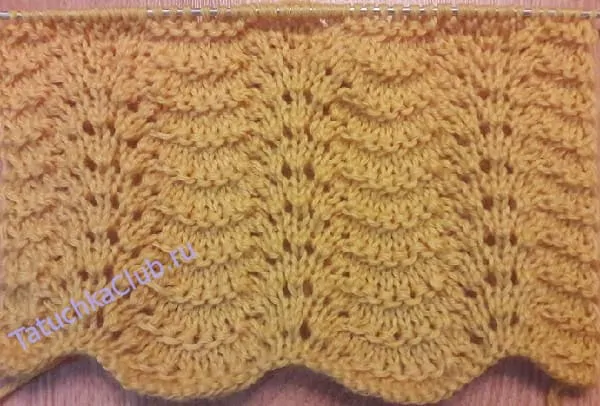

Number of loops is a multiple of 18 + 2 crs.
1 st: single st; 2 st: straight st; 3 st: 2 sts in a straight line; 3 sts: 2 sts in a straight line; 3 sts: sts in a straight line; 3 sts: sts in a straight line. - 3 rhs, (hook, 1 front) - 6 sts, 2 sts in a straight line - 3 rhs. 4 rh.
As you can see, only the third p. has changed, and the look of the pattern is slightly different. The knitted peacock feather pattern has become more embossed.
Peacock: pictures drawn for sketching
Now you know how to draw a peacock and even make crafts of this bird. To learn how to paint beautifully on canvas, you have to practice as much as possible. Here are pictures of the peacock drawn for sketching:
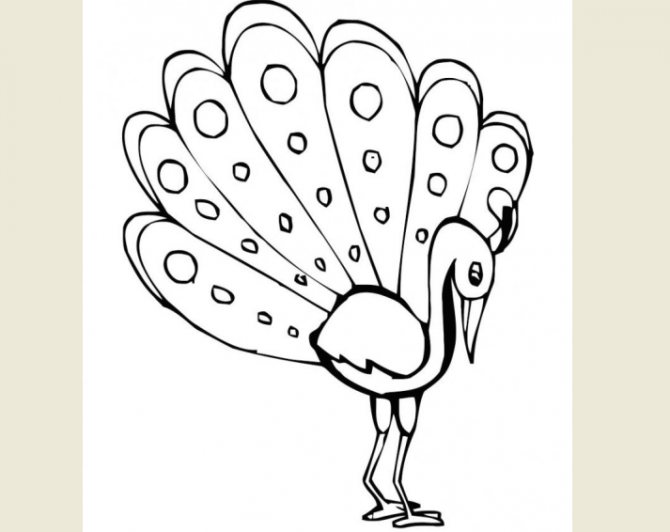

Peacock: pictures drawn for sketching Peacock: pictures drawn for sketching Peacock: pictures drawn for sketching Peacock: pictures drawn for sketching Peacock: pictures drawn for sketching Peacock: pictures drawn for sketching Peacock: Pictures drawn for sketching Peacock: pictures drawn for sketching Peacock: pictures drawn for sketching Peacock: pictures drawn for sketching Peacock: pictures drawn for sketching Peacock: pictures drawn for sketching Peacock: pictures drawn for sketching
